Welcome to Cucina Frizione!
Once again welcome to my first website. Cucina Frizione will chronicle my adventures into the world of food and cooking. There will also be posts on beer and eventually other interest of mine might make their way on to the website. Thanks for visting and I hope you enjoy.
Labor Day Barbecue
It has been a while since I have update my site here. It's fitting that the last post was on a holiday, Memorial Day, and now the next update is on Labor Day. I've been in the mood for some pulled pork for a couple of weeks and thought this would be the best time to make some. So on Labor Day, I spent all day laboring over the smoker and the oven. It was well worth it. I also decided to make a macaroni and cheese to go with the bbq pork. Well enough with the small talk and intro and let's get to the recipes.
Pulled Pork
4-5 lb Boston Butt (pork shoulder)
Spice Rub
Apple Wood Chips
For Brine:
64 oz. water
4 oz. salt
2 oz. molasses
2 oz. maple syrup
Most people do not brine their Boston Butt before smoking since there is enough fat marbled throughout the meat to keep it moist during cooking. Well I say if we can impart more flavor for just a night in the fridge lets do it. I dissolved the salt, molasses, and the maple syrup with the water in a plastic container big enough to hold the pork shoulder. I also added a tablespoon of the rub just to get some different flavor profiles in there. After shaking to make sure all the salt is dissolved open the lid and place the pork shoulder in the container. Pop this in the fridge over night or for at least eight hours.
The next morning take the shoulder out of the fridge and give it a good rinse off in the sink. Dry with paper towels. I then place mine on a wire rack inside of a sheet pan and place back in the fridge for a few hours to help make sure the the pork shoulder is dry. The point of getting the flesh as dry as possible is that the smoke will penetrate the meat more where as if the surface was wet the smoke stay on the outside and not get into the meat to form the smoke ring on the meat. I then sprinkle on some of my homemade rub using Alton Brown's 8:3:1:1 method that is described in more detail here. Basically the rub is 8 parts brown sugar, 3 parts salt, 1 part chili powder, and the last 1 part is made up of other spices of your choosing. I generously rub this on the shoulder and let it stand while I get the smoker ready.
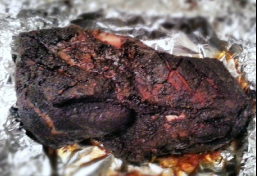
The smoker that I use is an electric one, so I just plug it in and let it heat up. I put some apple wood chips that have been soaked in water into the smoker before placing the pork shoulder in there. The chips need replacing every hour or so. I let the butt smoke for around six hours in the smoker. To finish the cooking time I wrapped the meat up in aluminum foil and placed it in a 225*F oven for six hours. I also added just a little bit of apple cider vinegar into the foil packet before I sealed it up.
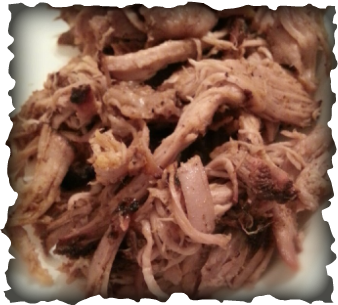
12 hours is a long time to wait on something to eat but this pulled pork was worth the wait. This may have been the best pulled pork I have made so far, if not it is there at the top. I do know that it was the easiest I ever pulled. I think this was do to finishing the cooking in the over where controlling the temperature at 225*F is easier than it is on the smoker.
Spice Rub
Apple Wood Chips
For Brine:
64 oz. water
4 oz. salt
2 oz. molasses
2 oz. maple syrup
Most people do not brine their Boston Butt before smoking since there is enough fat marbled throughout the meat to keep it moist during cooking. Well I say if we can impart more flavor for just a night in the fridge lets do it. I dissolved the salt, molasses, and the maple syrup with the water in a plastic container big enough to hold the pork shoulder. I also added a tablespoon of the rub just to get some different flavor profiles in there. After shaking to make sure all the salt is dissolved open the lid and place the pork shoulder in the container. Pop this in the fridge over night or for at least eight hours.
The next morning take the shoulder out of the fridge and give it a good rinse off in the sink. Dry with paper towels. I then place mine on a wire rack inside of a sheet pan and place back in the fridge for a few hours to help make sure the the pork shoulder is dry. The point of getting the flesh as dry as possible is that the smoke will penetrate the meat more where as if the surface was wet the smoke stay on the outside and not get into the meat to form the smoke ring on the meat. I then sprinkle on some of my homemade rub using Alton Brown's 8:3:1:1 method that is described in more detail here. Basically the rub is 8 parts brown sugar, 3 parts salt, 1 part chili powder, and the last 1 part is made up of other spices of your choosing. I generously rub this on the shoulder and let it stand while I get the smoker ready.
The smoker that I use is an electric one, so I just plug it in and let it heat up. I put some apple wood chips that have been soaked in water into the smoker before placing the pork shoulder in there. The chips need replacing every hour or so. I let the butt smoke for around six hours in the smoker. To finish the cooking time I wrapped the meat up in aluminum foil and placed it in a 225*F oven for six hours. I also added just a little bit of apple cider vinegar into the foil packet before I sealed it up.
12 hours is a long time to wait on something to eat but this pulled pork was worth the wait. This may have been the best pulled pork I have made so far, if not it is there at the top. I do know that it was the easiest I ever pulled. I think this was do to finishing the cooking in the over where controlling the temperature at 225*F is easier than it is on the smoker.
Mac and Cheese
12 oz. whole wheat pasta
8 oz. sharp cheddar
8 oz. other cheese
6 slices American cheese
2 oz. butter
2 oz. AP flour (by weight)
32 oz. 2% milk
1 tbsp. mustard, ground 1/2 tsp. salt
1 tsp. garlic powder 1/8 tsp. cumin
1 tsp. paprika
1 tsp. sriracha
1/2 tsp. nutmeg
1/2 tsp. black pepper
I like to use whole wheat pasta in my mac and cheese because it provides more flavor than just plain old white flour pasta. I use penne and medium shells for a better texture and the cheese fills up the space in each. I use six ounces each of the penne and shells. I boil the pasta to al dente since it will also cook later in the over.
For the cheese sauce I start off with a basic roux. I cook the butter and flour until it takes on an almond color. I then add the milk gradually. After I get about two cups incorporated and it starts to thicken I add the spices and salt. Then I continue to gradually add all the milk in. When the sauce is thick it is time to add the cheese. Please, please, please grate your own cheese from a block. Yes it does taste better than prepackaged grated cheese. I used Tillamook sharp cheddar and Jarlsburg Swiss. I also use cheddar as a good base but mix up the other eight ounces. Gradually add the cheese until it is all incorporated and smooth.
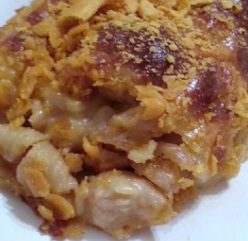
I then pour it over the drained pasta and mix. I pour the mac and cheese into a buttered 9x13 cake pan and place in a 350*F oven for twenty minutes. While this is in the oven I put a cup of cheese crackers, I used Goldfish, into a plastic sandwich bag and crush them. After twenty minutes I take the mac and cheese out of the oven and place the American cheese slice evenly over it. I then sprinkle the crushed crackers on top. Place back into the oven for 20 minutes or until the cheese starts to melt. I like to let the mac and cheese cool for about five minutes before I cut into it.
8 oz. sharp cheddar
8 oz. other cheese
6 slices American cheese
2 oz. butter
2 oz. AP flour (by weight)
32 oz. 2% milk
1 tbsp. mustard, ground 1/2 tsp. salt
1 tsp. garlic powder 1/8 tsp. cumin
1 tsp. paprika
1 tsp. sriracha
1/2 tsp. nutmeg
1/2 tsp. black pepper
I like to use whole wheat pasta in my mac and cheese because it provides more flavor than just plain old white flour pasta. I use penne and medium shells for a better texture and the cheese fills up the space in each. I use six ounces each of the penne and shells. I boil the pasta to al dente since it will also cook later in the over.
For the cheese sauce I start off with a basic roux. I cook the butter and flour until it takes on an almond color. I then add the milk gradually. After I get about two cups incorporated and it starts to thicken I add the spices and salt. Then I continue to gradually add all the milk in. When the sauce is thick it is time to add the cheese. Please, please, please grate your own cheese from a block. Yes it does taste better than prepackaged grated cheese. I used Tillamook sharp cheddar and Jarlsburg Swiss. I also use cheddar as a good base but mix up the other eight ounces. Gradually add the cheese until it is all incorporated and smooth.
I then pour it over the drained pasta and mix. I pour the mac and cheese into a buttered 9x13 cake pan and place in a 350*F oven for twenty minutes. While this is in the oven I put a cup of cheese crackers, I used Goldfish, into a plastic sandwich bag and crush them. After twenty minutes I take the mac and cheese out of the oven and place the American cheese slice evenly over it. I then sprinkle the crushed crackers on top. Place back into the oven for 20 minutes or until the cheese starts to melt. I like to let the mac and cheese cool for about five minutes before I cut into it.
Memorial Day Chicken
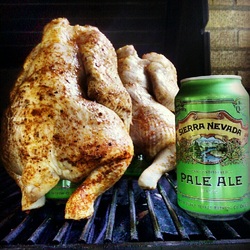
I've been wanting to try beer can chicken for a while now. I've also been waiting on the Sierra Nevada Pale Ale in cans since I first heard they were being released in February. I finally found the cans at the local grocery superstore Jungle Jim's the second to last weekend in May. Since I now had the cans and Memorial Day was the upcoming weekend, I decided it was the perfect time to finally try my hand at making beer can chicken.
First I put the chicken in a brine mixture and set that in the fridge overnight. The next morning I took the chicken out of the brine and patted them dry before placing both back in the refrigerator for about three hours to help the skin dry out. Since I had two chicken I decided to make one using my BBQ rub and the other using Zatarain's Creole seasoning. After placing the birds on the beer cans I rubbed each with canola oil then applied the BBQ rub to one and the Creole seasoning to the other.
Now it was time for the grill. I decided on using the gas grill since it was easier to maintain indirect medium heat for the 1 hour and 15 minute cooking time. Even though Hank Hill likes propane because it allows us to taste the flavor of the meat since its a clean burning fuel, I decided to put some apple wood chips in aluminum foil. I poked some hole in the aluminum foil pouch and place it on the grill on top of the flames. An hour and a fifteen minutes later, which was perfect time as the instant read read the thigh temperature as 165*F. I brought the chickens inside and allowed them a fifteen minute rest. After removing the cans and carving them up it was finally time to eat.
I can't begin to describe how juicy and tender the meat was. I never had a chicken that was so succulent in my life. My favorite was the Creole rubbed chicken as it has a little more kick to it then the BBQ rubbed one. The combination of spice and smoke flavor along with the tenderness of the meat easily made this chicken the best I've had in my life. My grandma even said it was great and everything she eats usually gets the same reaction from her, "It's no bad." I recommend trying beer can chicken yourself if you thought about it and have not made it yet. To those of you that never heard of beer can chicken, you should also make one and try it. It will be a crowd pleaser at your next cookout or it will please your taste buds as a weeknight dinner.
